OnDemand
Introduction#
The Sherlock OnDemand interface allows you to conduct your research on Sherlock through a web browser. You can manage files (create, edit and move them), submit and monitor your jobs, see their output, check the status of the job queue, run a Jupyter notebook and much more, without logging in to Sherlock the traditional way, via a SSH terminal connection.
Quote
In neuroimaging there are a number of software pipelines that output HTML reports heavy on images files. Sherlock OnDemand allows users to check those as they appear on their $SCRATCH folder, for quick quality control, instead of having to mount remote filesystems, download data locally or move to any other storage location. Since the data itself is already quite big and costly to move, OnDemand is extremely helpful for fast assessment.
-- Carolina Ramirez, Williams PANLab
More documentation#
Open OnDemand was created by the Ohio Supercomputer Center. ![]()
![]()
The following documentation is specifically intended for using OnDemand on Sherlock. For more complete documentation about OnDemand in general, please see the extensive documentation for OnDemand created by OSC, including many video tutorials.
Connecting#
Connection information
To connect to Sherlock OnDemand, simply point your browser to https://ondemand.sherlock.stanford.edu
Sherlock OnDemand requires the same level of authentication than connecting to Sherlock over SSH. You will be prompted for your SUNet ID and password, and will go through the regular two-step authentication process.
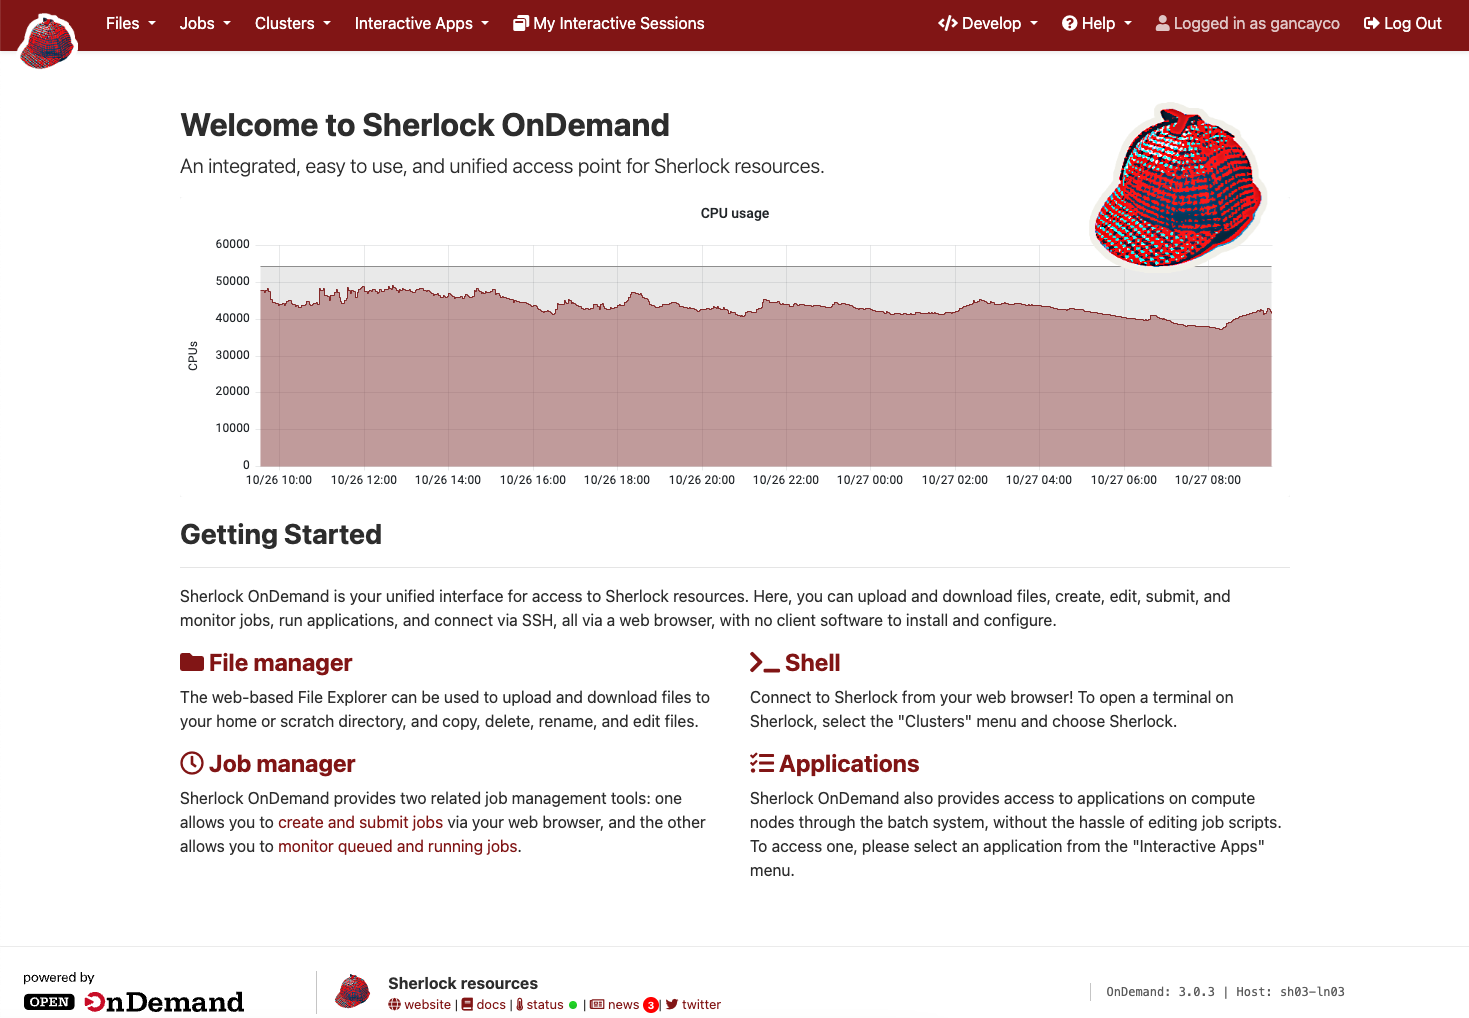
The Sherlock OnDemand Dashboard will then open. From there, you can use the menus across the top of the page to manage files, get a shell on Sherlock, submit jobs or open interactive applications such as Jupyter Notebooks or RStudio sessions.
To end your Sherlock OnDemand session, click on the "Log Out" link at the top right of the Dashboard window and close your browser.
Getting a shell#
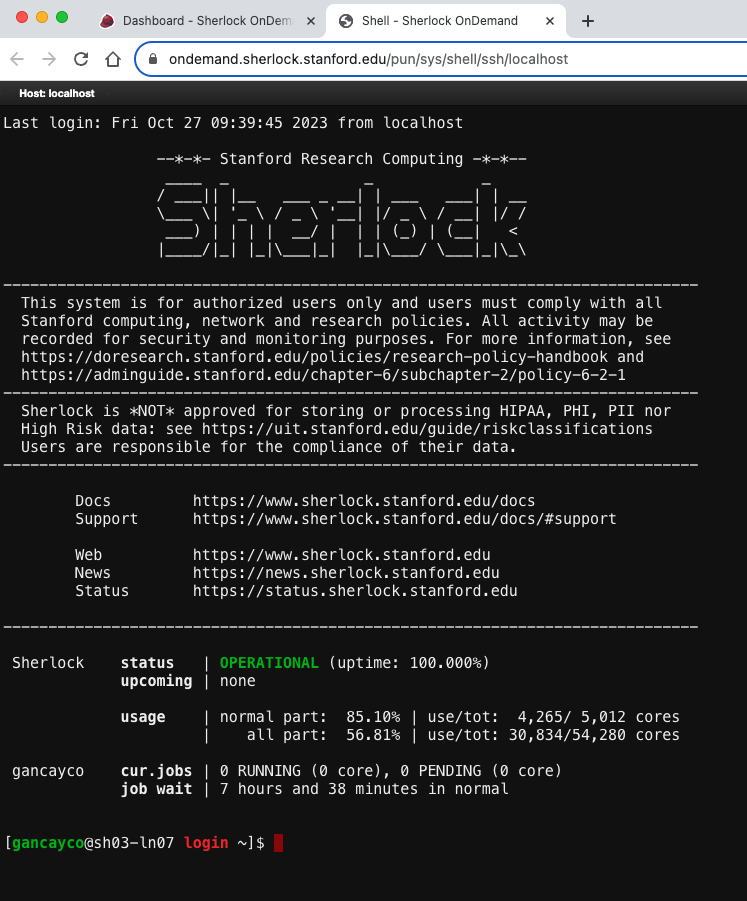
You can get shell access to Sherlock by choosing Clusters > Sherlock Shell Access from the top menu in the OnDemand Dashboard.
In the window that will open, you'll be logged in to one of Sherlock's login nodes, exactly as if you were using SSH to connect. Except you don't need to install any SSH client on your local machine, configure Kerberos or deal with your SSH client configuration to avoid endless two-factor prompts. How cool is that?
Managing files#
To create, edit or move files, click on the Files menu from the Dashboard page. A drop-down menu will appear, listing your most common storage locations on Sherlock: $HOME, $GROUP_HOME, $SCRATCH, $GROUP_SCRATCH, and all Oak storage you have access to, including your main $OAK1. Any rclone remotes you create on Sherlock to connect to cloud storage will appear here as well.
Choosing one of the file spaces opens the File Explorer in a new browser tab. The files in the selected directory are listed.
There are two sets of buttons in the File Explorer.
-
Under the three vertical dots menu next to each filename:
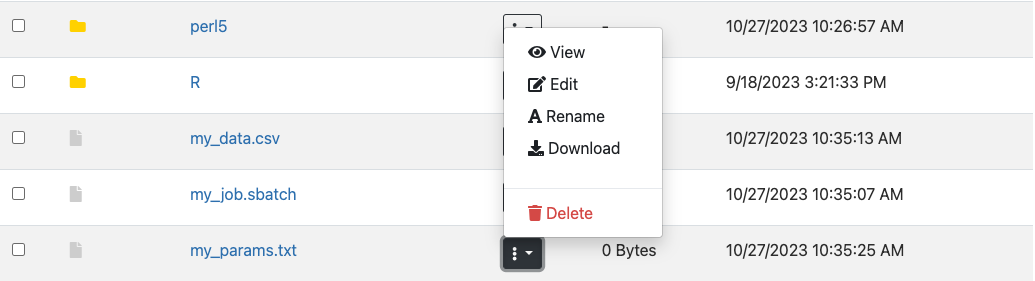 Those buttons allow you to View, Edit, Rename, Download, or Delete a file.
 -
At the top of the window, on the right side:
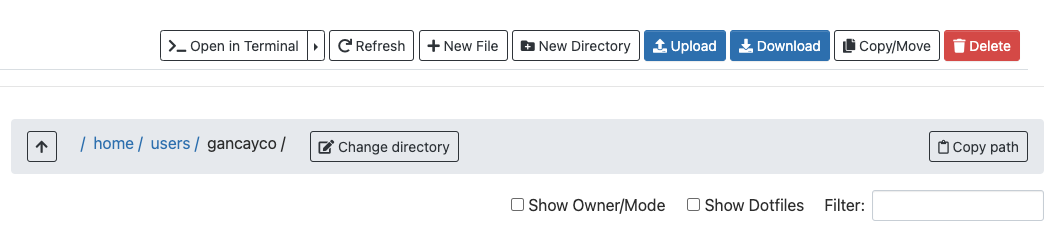
Button Function Open in Terminal Open a terminal window on Sherlock in a new browser tab Refresh Refresh the list of directory contents New File Create a new, empty file New Directory Create a new sub-directory Upload Copy a file from your local machine to Sherlock Download Download selected files to your local machine Copy/Move Copy or move selected files (after moving to a different directory) Delete Delete selected files Change directory Change your current working directory Copy path Copy the current working directory path to your clipboard Show Dotfiles Toggle the display of dotfiles (files starting with a ., which are usually hidden)Show Owner/Mode Toggle the display of owner and permission settings
Creating and editing jobs#
You can create new job scripts, edit existing scripts, and submit them to the scheduler through the Sherlock OnDemand interface.
From the top menus in the Dashboard, choose Jobs > Job Composer. A Job Composer window will open. There are two tabs at the top: Jobs and Templates.
In the Jobs tab, you'll find a list of the job you've submitted through OnDemand. The Templates tab will allow you to define your own job templates.
Creating a new job script#
To create a new job script. you'll need to follow the steps below.
Select a template#
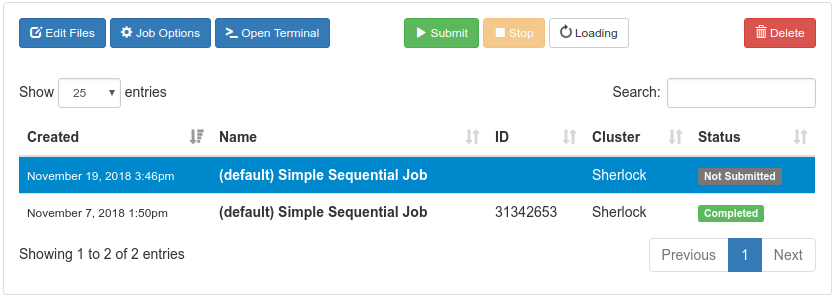
Go to the Jobs tab in the Jobs Composer interface. You'll find a default template there: "Simple Sequential Job".
To create a new job script, click the blue New Job > From Default Template button in the upper left. You'll see a green message at the top of the page indicating: "Job was successfully created".
At the right of the Jobs page, you can see the Job Details, including the location of the script and the script name (by default, main_job.sh). Under that, you will see the contents of the job script in a section named Submit Script.

Edit the job script#
You'll need to edit the job script, so it contains the commands and workflow that you want to submit to the scheduler.
If you need more resources than the defaults, you must include options to change them in the job script. For more details, see the Running jobs section.
You can edit the script in several ways:
- click the blue Edit Files button at the top of the Jobs tab in the Jobs Composer window,
- in the Jobs tab in the Jobs Composer window, find the Submit Script section at the bottom right. Click the blue Open Editor button.
After you save the file, the editor window remains open, but if you return to the Jobs Composer window, you will see that the content of your script has changed.
Edit the job options#
In the Jobs tab in the Jobs Composer window, click the blue Job Options button. The options for the selected job such as name, the job script to run, and the account it run under are displayed and can be edited. Click Save or Cancel to return to the job listing.
Submitting jobs#
To submit a job, select in in the Jobs tab in the Jobs Composer page. Click the green Submit button to submit the selected job. A message at the top of the window shows whether the job submission was successful or not. If it is not, you can edit the job script or options and resubmit. When the job is submitted successfully, the status of the job in the Jobs Composer window will change to Queued or Running. When the job completes, the status will change to Completed.
Monitoring jobs#
From the Dashboard page, The Jobs > Active Jobs top-level menu will bring you to a live view of Sherlock's scheduler queue. You'll be able to see all the jobs currently in queue, including running and pending jobs, as well as some details about individual jobs.
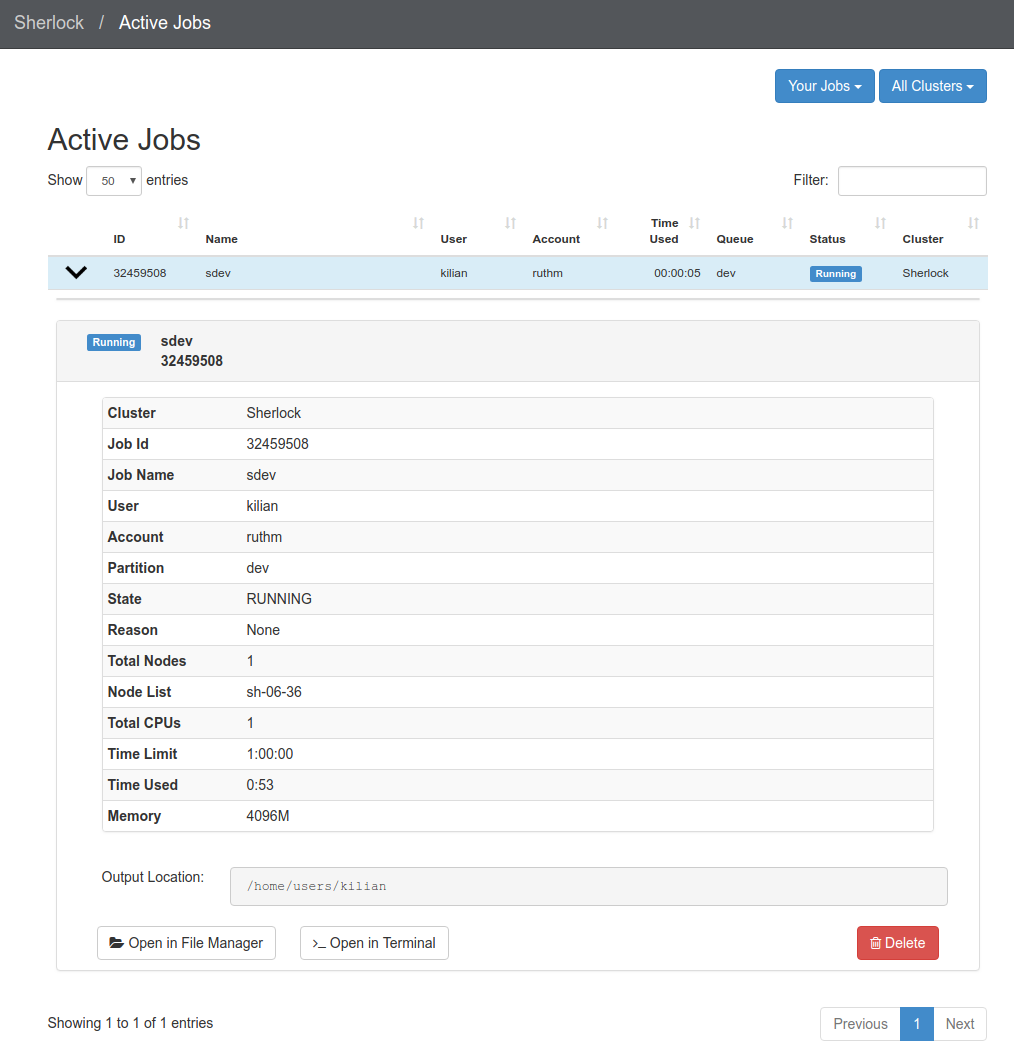
At the bottom of the detailed view, you'll find two button that will bring you to the directory where that job's files are located, either in the File Manager or in a Shell session.
Interactive applications#
One of the main features of Sherlock OnDemand is the ability to run interactive applications directly from the web interface, without leaving your web browser.
Jupyter Notebooks#
You can run Jupyter Notebooks (using Python, Julia or other languages) through Sherlock OnDemand.
Some preliminary setup may be required
Before running your first Jupyter Notebook with IJulia, you'll need to run the following steps (this only needs to be done once):
When you see the message that IJulia has been installed, you can end your interactive session.
To start a Jupyter session from Sherlock OnDemand:
-
Select Interactive Apps > Jupyter Notebook from the top menu in the Dashboard page.
-
In the screen that opens, specify the different parameters for your job (time limit, number of nodes, CPUs, partition to use, etc.). You can also choose to be notified by email when your notebook starts.

-
Click the blue Launch button to start your JupyterHub session. You may have to wait in the queue for resources to become available for you.
-
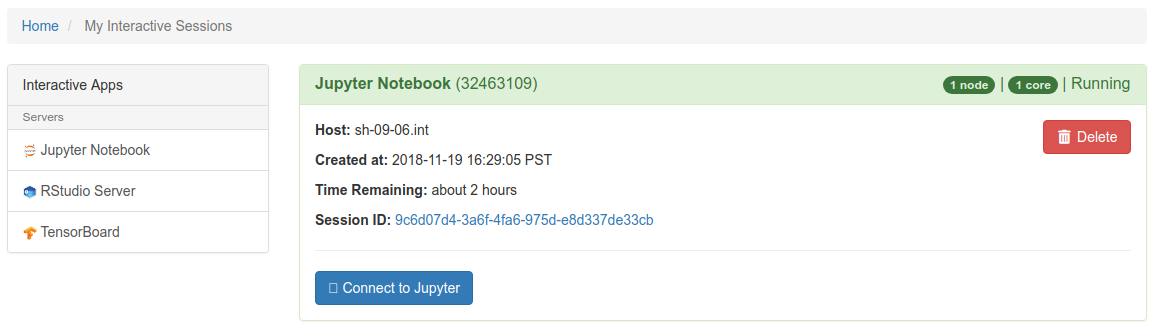
When your session starts, you can click on the blue Connect to Jupyter button to open your Jupyter Notebook. The Dashboard window will display information about your Jupyter session, including the name of the compute node it is running on, when it started, and how much time remains.
-
In your new Jupyter Notebook tab, you'll see 3 tabs: Files, Running and Clusters.

By default, you are in the Files tab; that displays the contents of your $HOME directory on Sherlock. You can navigate through your files there.
Under the Running tab, you will see the list of all the notebooks or terminal sessions that you have currently running.
-
You can now start a Jupyter Notebook:
- To open an existing Jupyter Notebook, which is already stored on Sherlock, navigate to its location in the Files tab and click on its name. A new window running the notebook will open.
- To create a new Jupyter Notebook, click on the New button at the top right of the file listing, and choose the kernel of your choice from the drop down.
To terminate your Jupyter Notebook session, go back to the Dashboard, and click on the My Interactive Sessions in the top menu. This will bring you to a page listing all your currently active interactive session. Identify the one you'd like to terminate and click on the red Cancel button.
JupyterLab#
To run JupyterLab via Sherlock OnDemand:
-
Select Interactive Apps > JupyterLab from the top menu in the Dashboard page.
-
In the screen that opens, specify the different parameters for your job (time limit, number of nodes, CPUs, partition to use, etc.). You can also choose to be notified by email when your session starts.
-
Click the blue Launch button to start your JupyterLab session. You may have to wait in the queue for resources to become available.
-
When your session starts, click the blue Connect to JupyterLab button. A new window opens with the JupyterLab interface.
-
The first time you connect to JupyterLab via Sherlock OnDemand, you'll see 2 tabs: Files and Launcher.
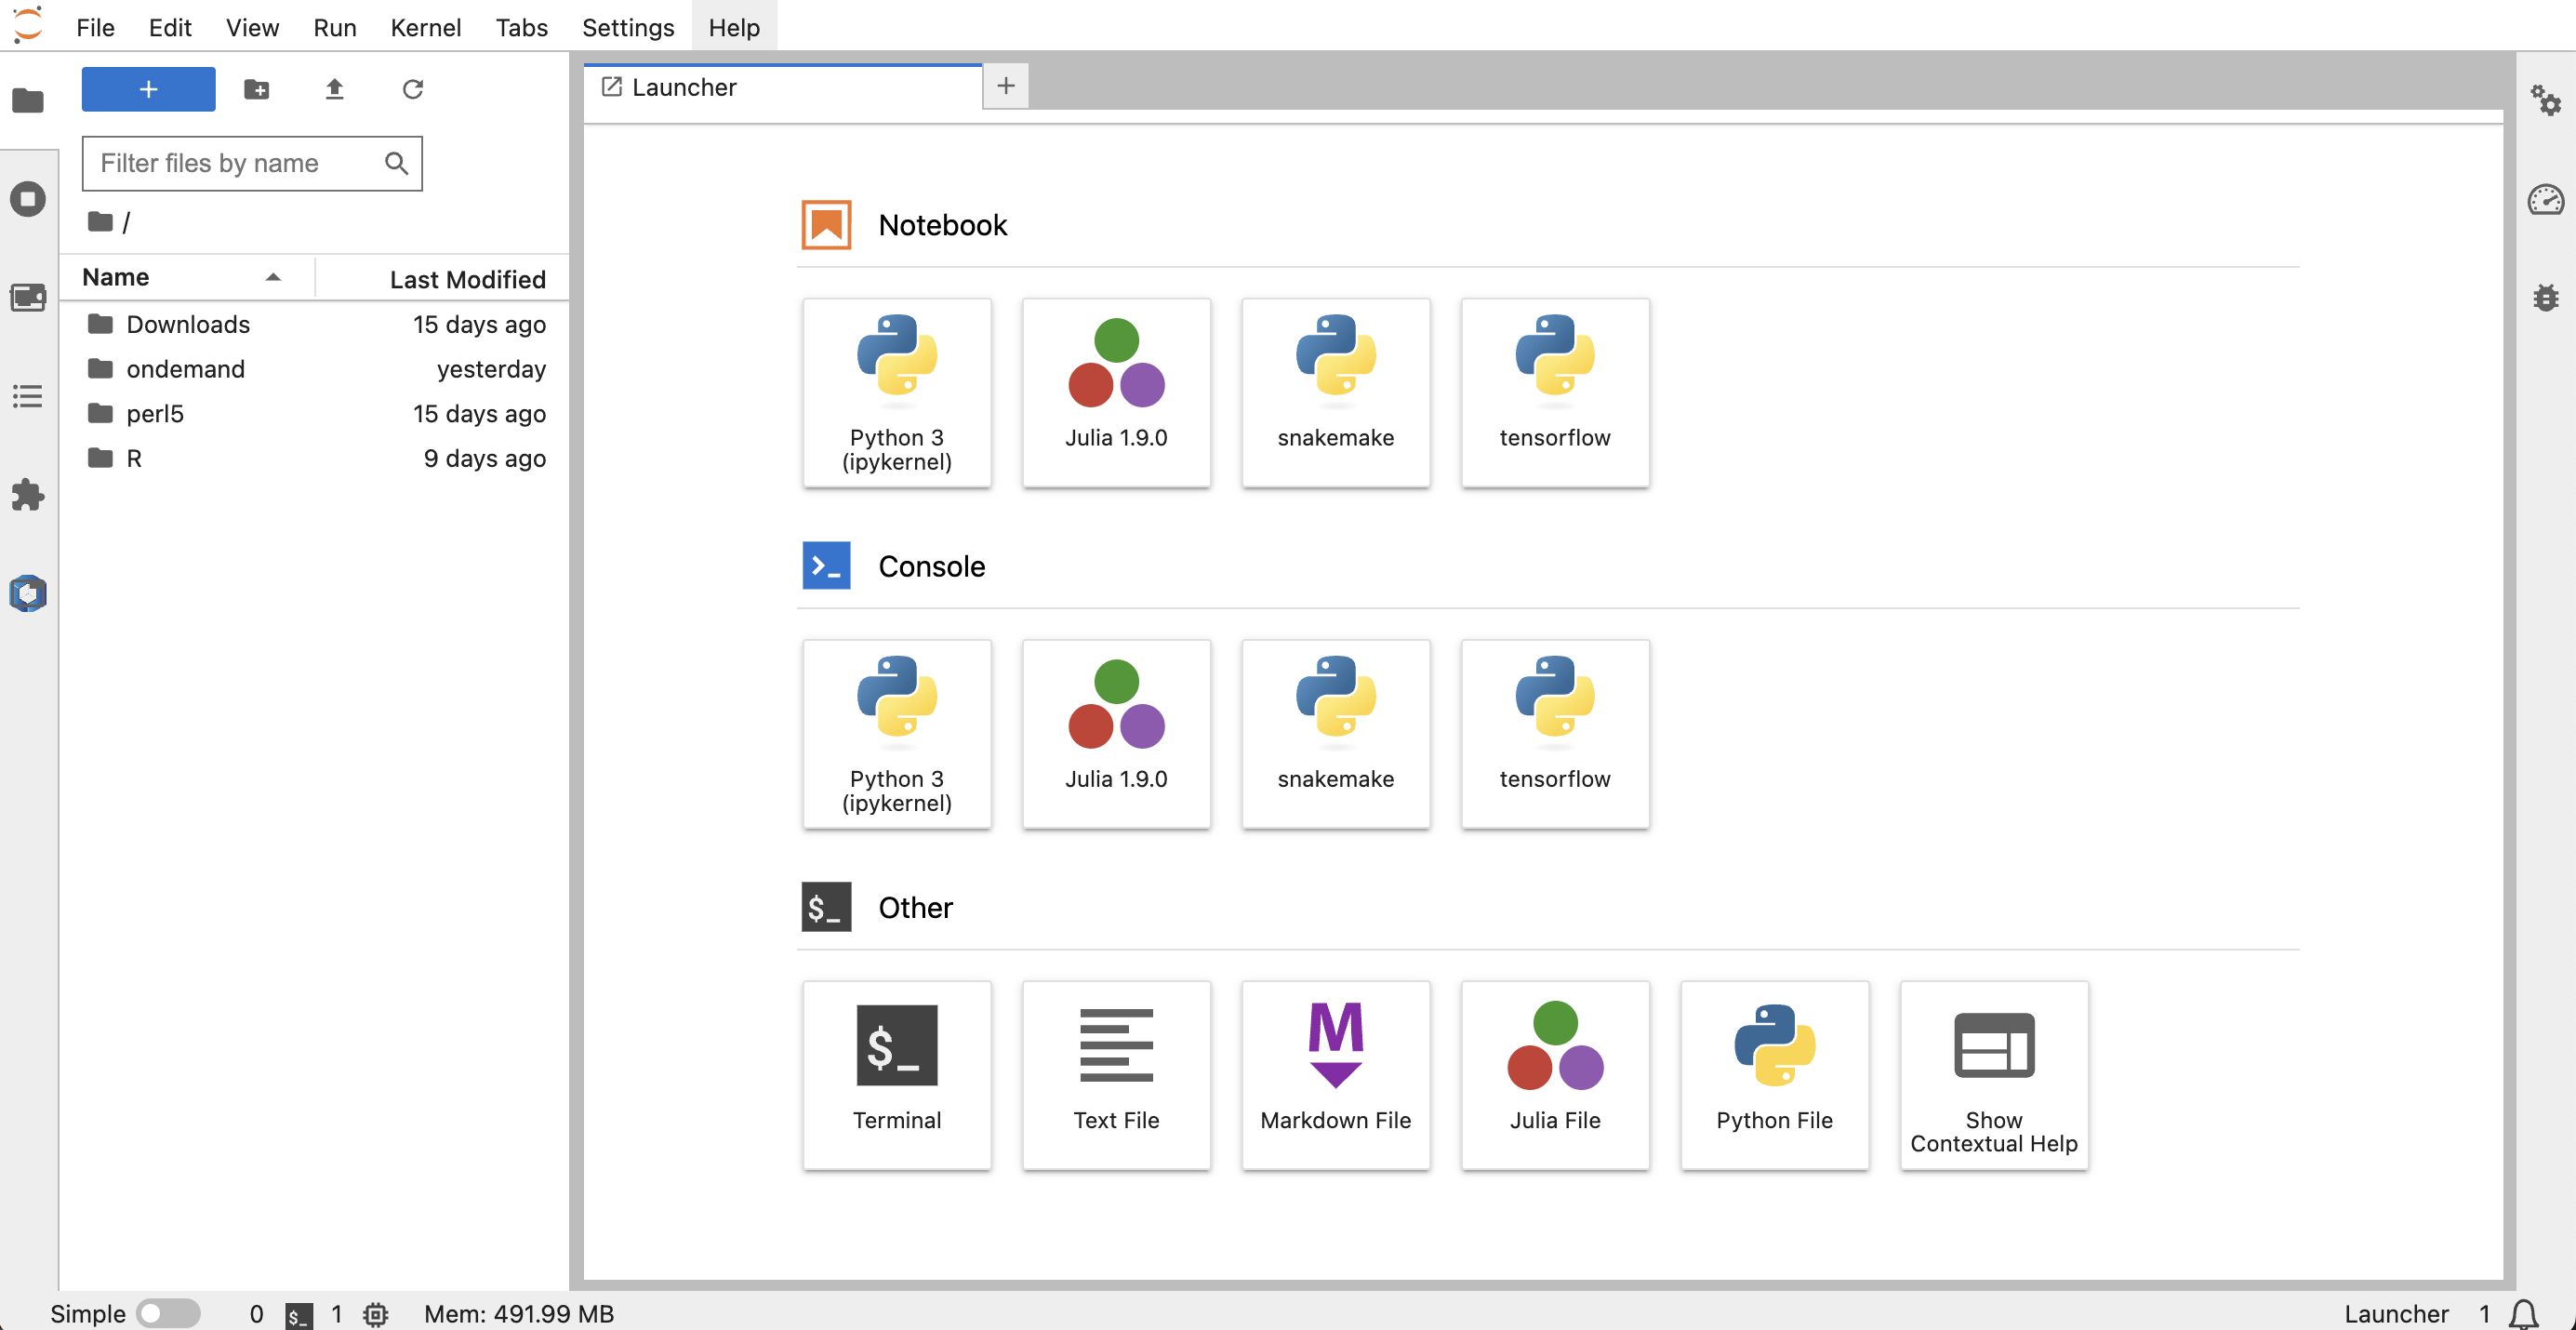
The Files tab displays the contents of your $HOME directory on Sherlock. You can navigate through your files there.
In the Launcher tab, you will have the option to create a new Jupyter Notebook new Console session by clicking the tile showing the kernel of your choice. You can also open the Terminal or a text editor for a variety of file types by clicking the corresponding tile.
To create a new kernel for IJulia:
-
In the Launcher, click the Terminal tile in the "Other" section.
-
In the Terminal, run the following commands:
-
Open a new Launcher tab by clicking the + sign next to your open Terminal tab. Julia will now be listed in the "Notebook" and "Console" sections as an available kernel.
To create a custom kernel for a virtual environment using Python 3.x:
-
In a shell session, activate your environment and run the following:
This will create a kernel for the environment
env. It will appear asMy Envin the JupyterLab Launcher.Creating a custom kernel for a Python 2.x environment
When working with a Python 2.x environment, use the
python/pipcommands instead. -
The custom kernel will now be listed as option in the "Notebook" and "Console" sections in the JupyterLab Launcher. To start a Jupyter Notebook using your virtual environment, click on the tile for that kernel.
Creating a custom kernel for a conda environment
In order to use a kernel created from a conda environment, you must unload the
pythonandpy-jupyterlabmodules from your JupyterLab session. This can be done using the JupyterLab Lmod extension. To use the Lmod extension, select the bottom tab in the left side menu of your JupyterLab window. You may also need to restart the kernel for your notebook or console.
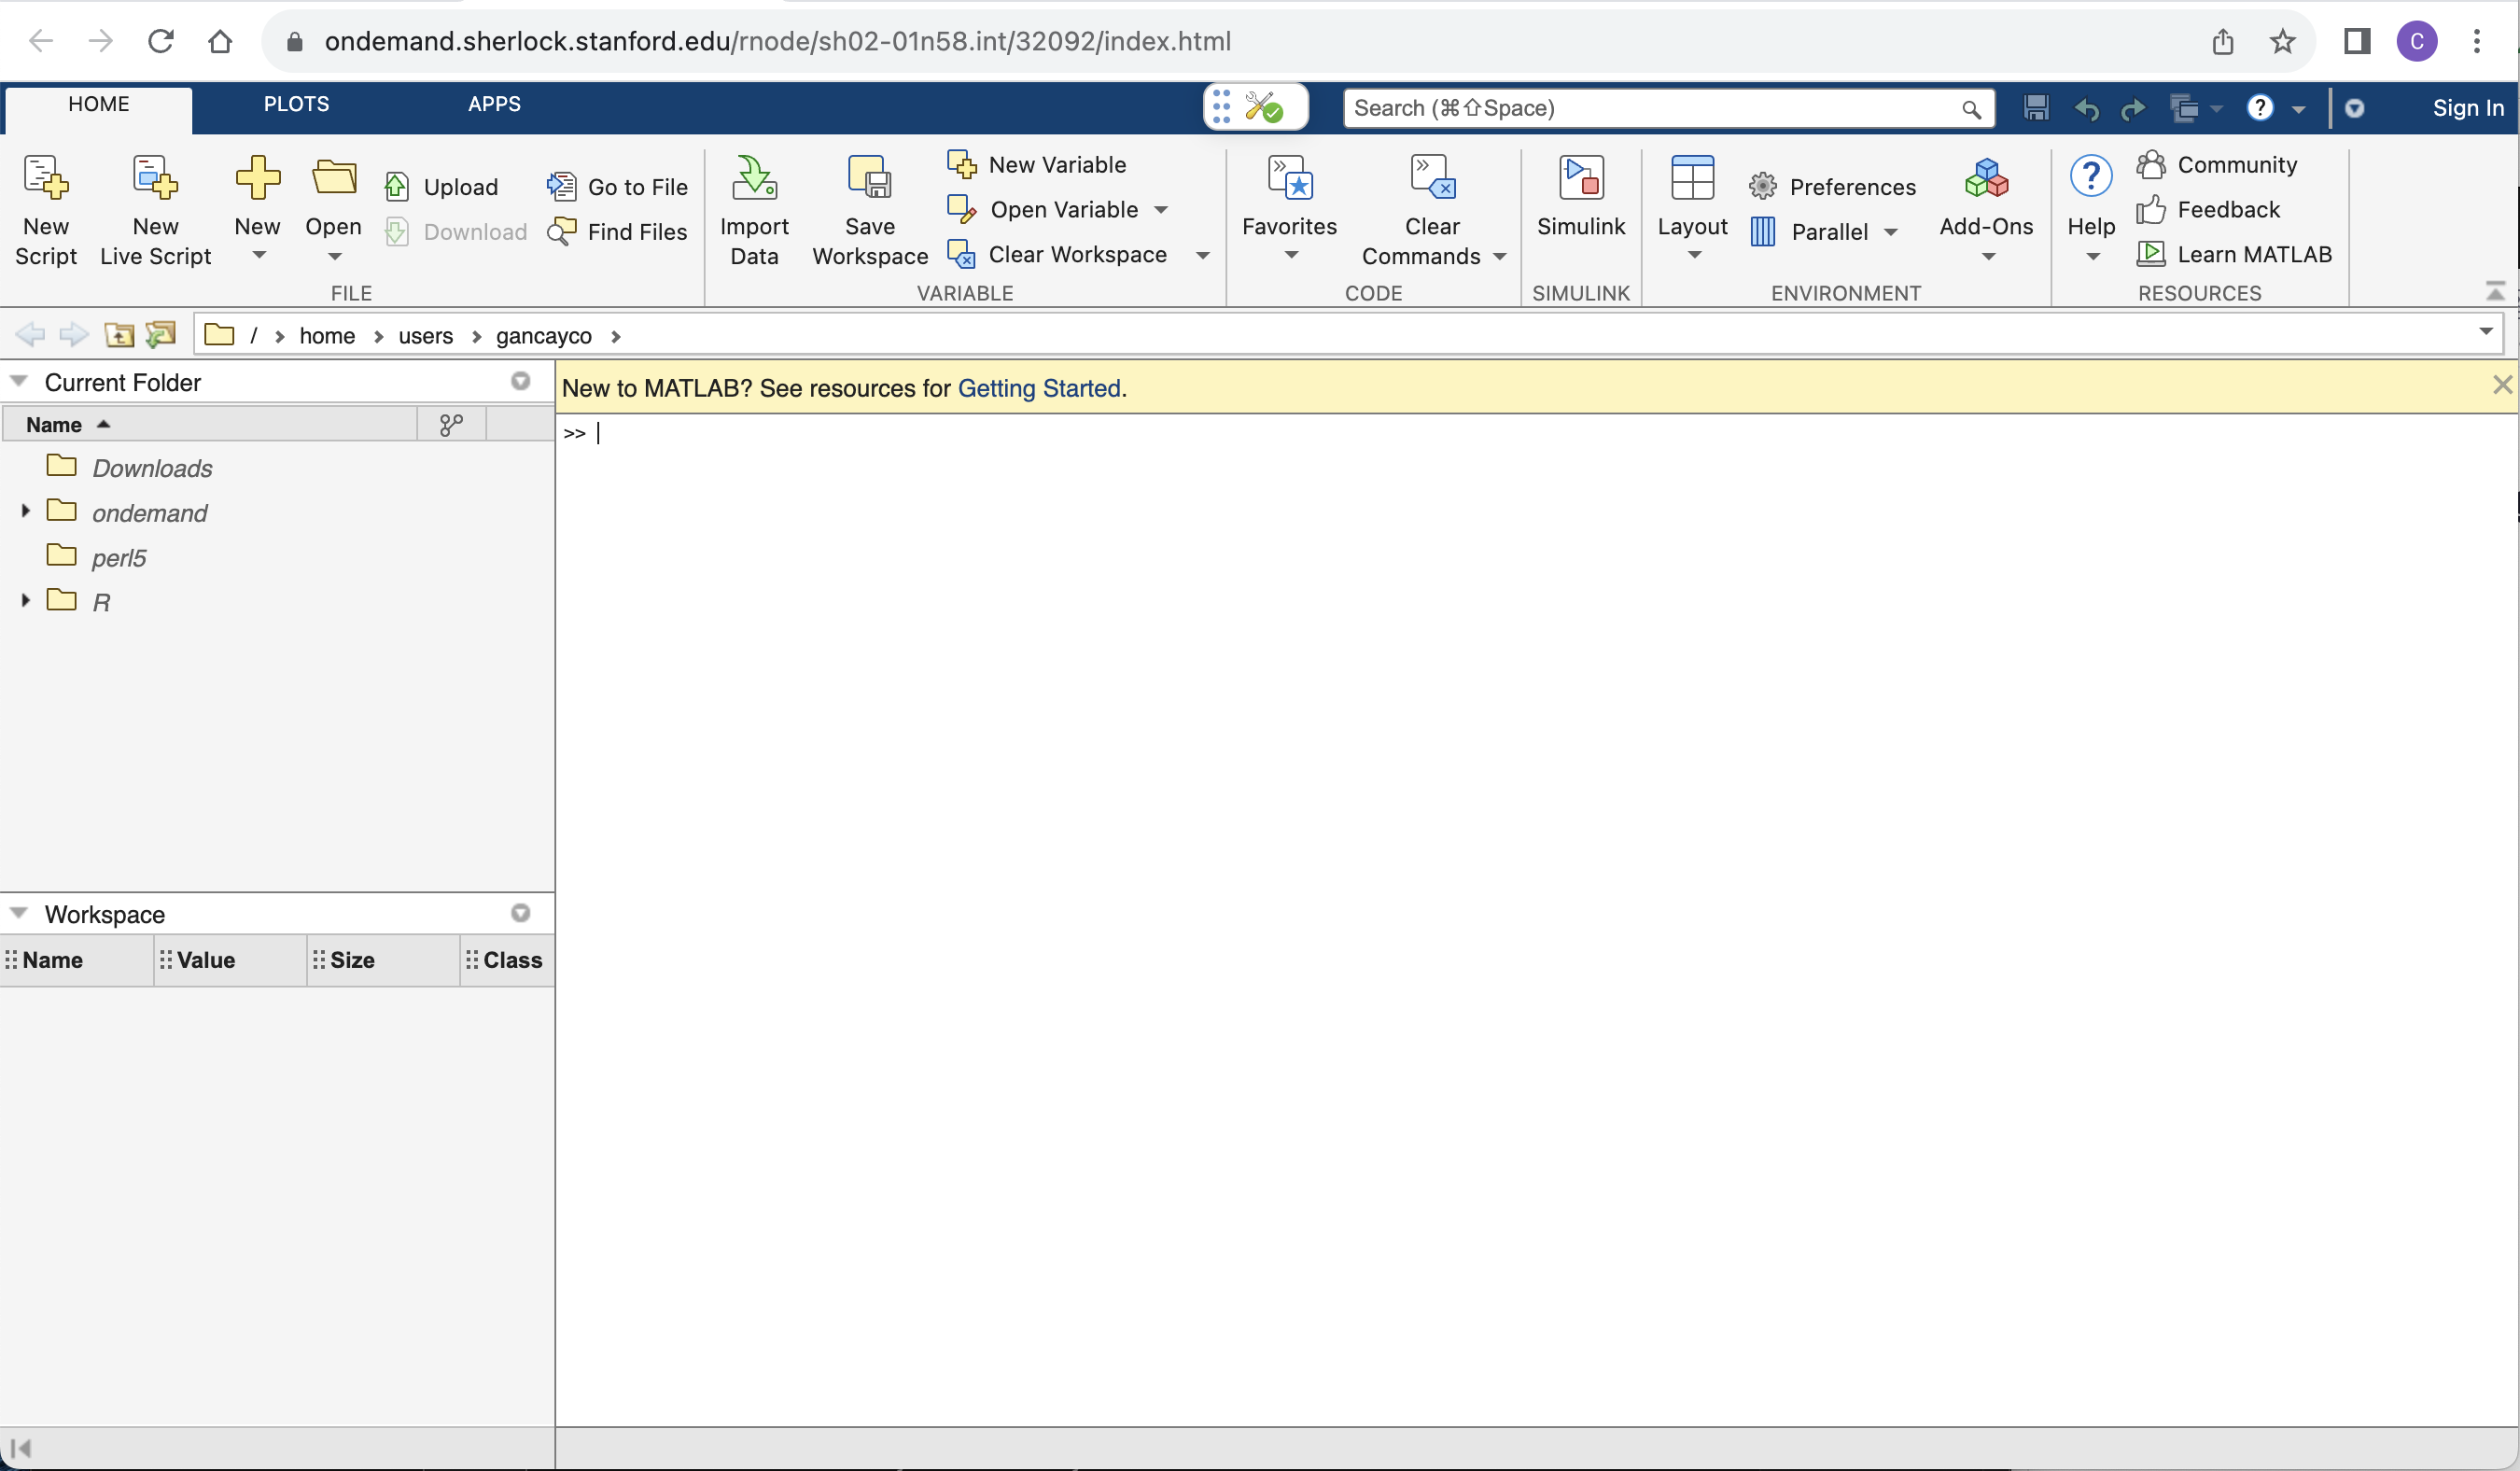
MATLAB#
To run MATLAB via Sherlock OnDemand:
-
Select Interactive Apps > MATLAB from the top menu in the Dashboard page.
-
In the screen that opens, specify the different parameters for your job (time limit, number of nodes, CPUs, partition to use, etc.). You can also choose to be notified by email when your session starts.
-
Click the blue Launch button to start your MATLAB session. You may have to wait in the queue for resources to become available.
-
When your session starts, click the blue Connect to MATLAB button. A new window opens with the MATLAB interface.
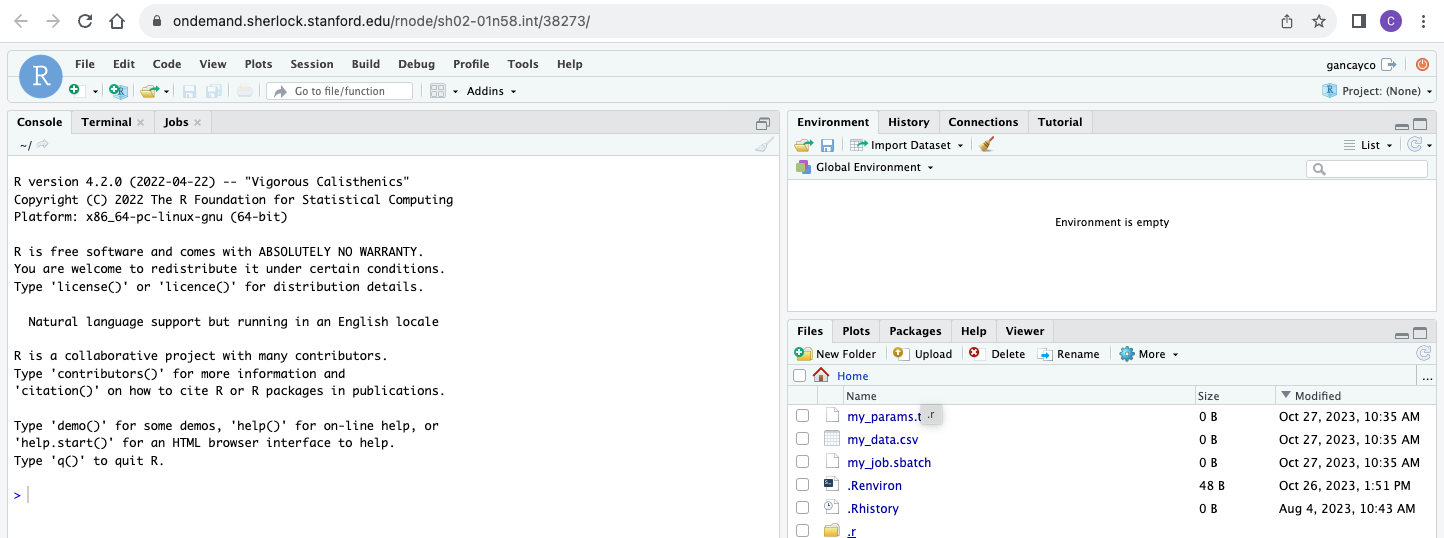
RStudio#
To run RStudio via Sherlock OnDemand:
-
Select Interactive Apps > RStudio Server from the top menu in the Dashboard page.
-
In the screen that opens, specify the different parameters for your job (time limit, number of nodes, CPUs, partition to use, etc.). You can also choose to be notified by email when your session starts.
-
Click the blue Launch button to start your RStudio session. You may have to wait in the queue for resources to become available.
-
When your session starts, click the blue Connect to RStudio Server button. A new window opens with the RStudio interface.
Installing packages in RStudio
You may encounter errors while installing R packages within RStudio. First try installing R packages in a shell session on the Sherlock command line. See our R packages documentation for more information.
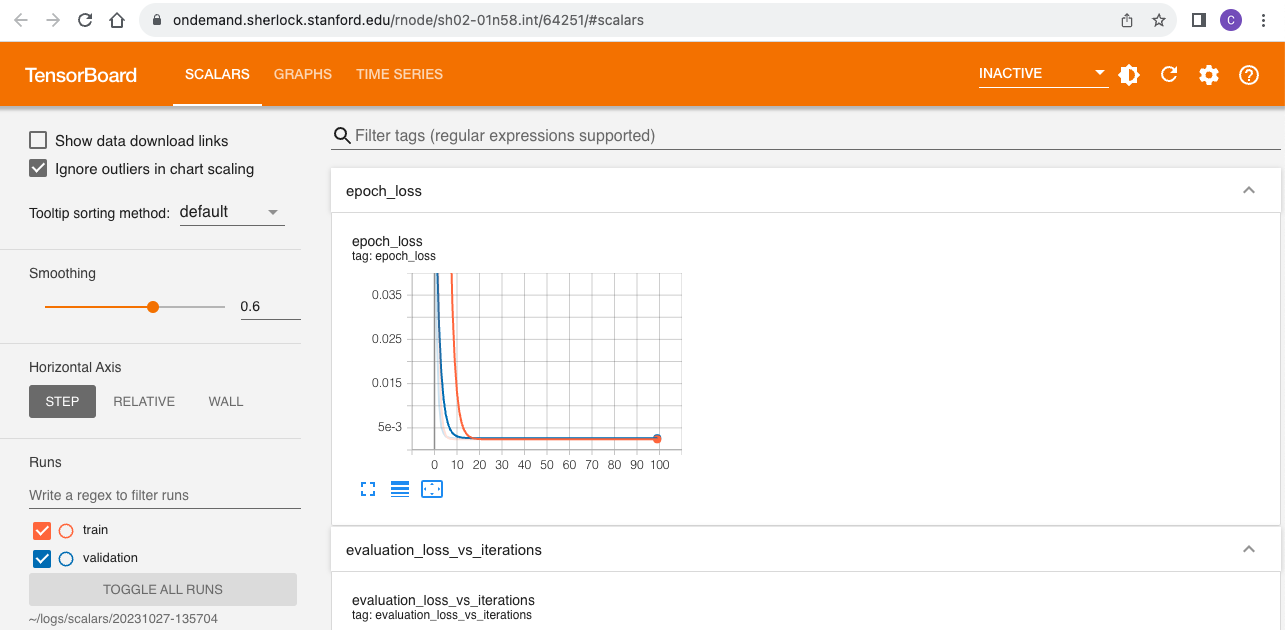
TensorBoard#
To run TensorBoard via Sherlock OnDemand:
-
Select Interactive Apps > TensorBoard from the top menu in the Dashboard page.
-
In the screen that opens, specify the different parameters for your job (time limit, number of nodes, CPUs, partition to use, etc.). You can also choose to be notified by email when your session starts.
-
Click the blue Launch button to start your TensorBoard session. You may have to wait in the queue for resources to become available.
-
When your session starts, click the blue Connect to TensorBoard button. A new window opens with the TensorBoard interface.
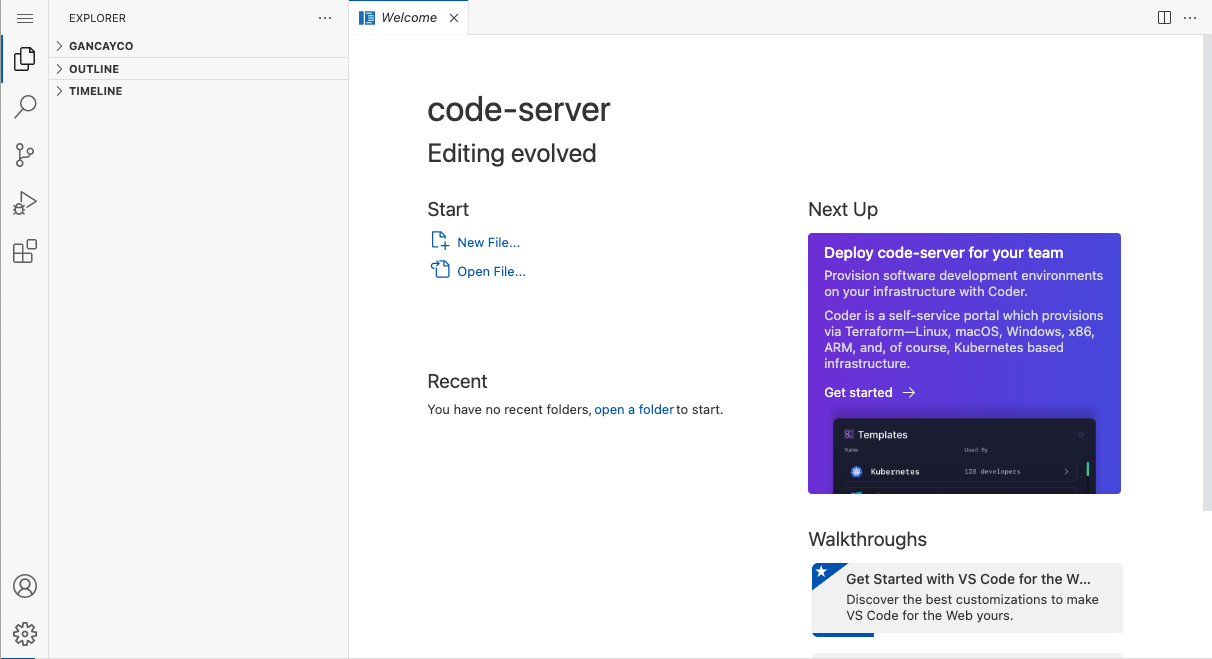
VS Code#
You can use VS Code on Sherlock through the code-server interactive app.
Using your local VS Code with remote SSH
Connecting to Sherlock from VS Code on your local machine is not supported at this time due to a known issue with the closed-source "Remote SSH" extension.
To start a VS Code session via Sherlock OnDemand:
-
Select Interactive Apps > code-server from the top menu in the Dashboard page.
-
In the screen that opens, specify the different parameters for your job (time limit, number of nodes, CPUs, partition to use, etc.). You can also choose to be notified by email when your session starts.
-
Click the blue Launch button to start your code-server session. You may have to wait in the queue for resources to become available.
-
When your session starts, click the blue Connect to code-server button. A new window opens with the code-server interface.
AI coding assistant in code-server#
You can use the Continue extension to connect code-server to an Ollama server running on a Sherlock GPU node, giving you an AI coding assistant without sending your code to external services.
After installing Continue in code-server, the Continue icon will appear in the left-hand panel (or via Ctrl+L). Before it can be used, the extension needs to be configured to point at the Ollama server.
The Continue configuration file does not support environment variable interpolation, so the easiest approach is to set up SSH local port forwarding first (see Connecting to the server on the Ollama page), then point Continue at localhost:
After that, in the Continue panel, you can start chatting with the model. More details are available in the Ollama documentation.
Common Issues#
No Space Left on Device#
Occasionally, you may get an error message like the one below:
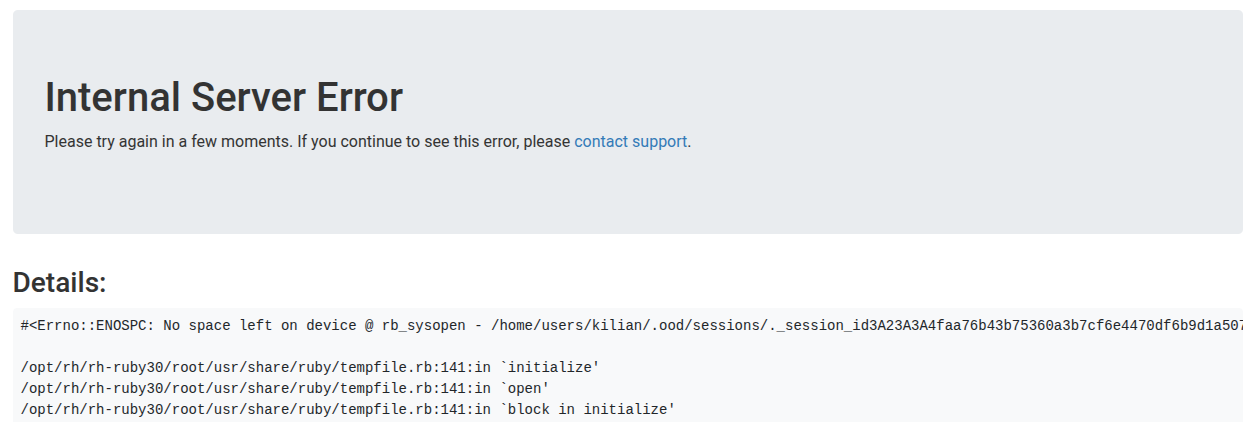
Quota exceeded
This means that you have exceeded your storage quota in your Sherlock $HOME directory.
Because this issue prevents OnDemand from running, you will probably not be able to use the "Files" menu the web browser to help you clean up. Instead, you will need to connect to the cluster with ssh.
Once connected, you'll be able to identify the largest space consumers in your $HOME directory, and either delete or move them to a different storage location.
Emptying ~/.cache
Among potential candidates, your ~/.cache directory is usually safe to empty, since files there are temporary files that can be re-created as needed. You can empty this directory by running:
Bad Request#
Another common error looks something like this:
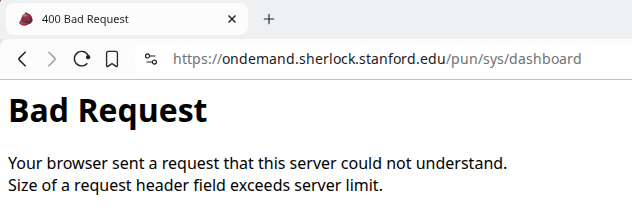
This issue is caused by some session cookies that may have grown beyond what can be handled by the server. This can usually be addressed by clearing your browser cookies.
Cleaning site-specific cookies
For a more targetted approach, you can delete only the cookies for the ondemand.sherlock.stanford.edu site. Instruction to do this vary by browser, but for Chrome, Firefox and Edge, you can usually click on the padlock icon to the left of the URL in the address bar, then click on "Cookies" or "Site Settings" to manage or delete cookies for that site. Please refer to your browser's documentation for details.
If the issue persists, switching browsers or using "Incognito Mode" can work as a temporary workaround.
Support#
If you are experiencing issues with Sherlock or your interactive session, you can contact us directly from Sherlock OnDemand.
To submit a ticket about Sherlock or Sherlock OnDemand in general:
-
Select Help -> Submit Support Ticket from the top menu in the Dashboard page.
-
In the screen that opens, complete the Support Ticket form. When applicable, please provide:
-
the full path to any files involved in your question or problem,
-
the command(s) you ran, and/or the job submission script(s) you used,
-
the exact, entire error message (or trace) you received.
-
-
Click the blue Submit support ticket form. Research Computing support will respond to you as soon as we are able.
To submit a ticket about your current or recent interactive session:
-
Select My Interactive Sessions from the top menu in the Dashboard page.
-
In the screen that opens, find the card for the session you need help with. Active sessions will have a green header, and past sessions will have a gray header. Click that card's Submit support ticket link to open the Support Ticket form.
-
Complete the Support Ticket form. When applicable, please provide:
-
the full path to any files involved in your question or problem,
-
the command(s) you ran, and/or the job submission script(s) you used,
-
the exact, entire error message (or trace) you received.
-
-
Click the blue Submit support ticket form. Research Computing support will respond to you as soon as we are able.
-
if you have access to the Oak storage system. ↩